Course 7 - Extended Admin Capabilities
Lessons
7.1: What is the Element Pricing Matrix, and When Should It Be Used?
Estimated Reading Time: 1.5 minutes
Automated Procurement Costing
Calculating campaign production budgets manually across a large retail network is a recipe for manual error. The Element Pricing Matrix removes this risk by embedding your print, material, and vendor rate sheets directly into the platform's distribution logic.
When to Use It
Instead of estimating creative production bills after a campaign launches, you map your structural pricing rules inside the matrix beforehand. The system calculates costs dynamically based on:
- Production Substrates: Differentiate baseline costs automatically between premium materials (like vinyl or acrylic layouts) and standard paper stocks.
- Volume Tiers: Set up economy-of-scale discount breaks that automatically adjust item unit costs as your total estate allocation quantity increases.
- Vendor Assignments: Link specific pricing rules to corresponding production suppliers to track cost variations instantly.
The Takeaway: The Element Pricing Matrix converts procurement data into an automated budgeting tool. By tying pricing structures to your elements, central teams see accurate total campaign costs before sending the final job files to the printers.
7.1: What are Artwork Brief Fields, and How Do They Support Campaign Workflows?
Estimated Reading Time: 1.5 minutes
Structuring Studio Production Requests
Creative teams work most effectively when key requirements are defined from the outset. If a campaign requires localised messaging, region-specific pricing, or bespoke dimensions, these details should be captured before design work begins. Artwork Brief Fields are configurable text, numeric and selection fields within design requests that help gather and standardise these requirements, ensuring designers have all the information they need from the start.
Why Workflow Fields Matter
Standardised brief fields help ensure important design requirements don't get lost in back-and-forth emails or disconnected conversations:
- For Studio Management: Designers receive clear, structured instructions inside the active workspace, reducing the need for revisions.
- For Localised Scaling: Planners can enter tailored details such as regional event dates or currency adjustment directly inside their campaign
- For Asset Security: Built-in controls ensure key tracking information stays linked to the artwork throughout production and fulfilment.
The Takeaway: Artwork Brief Fields standardise how design instructions are captured. They provide a structured handover, ensuring all required localised details are recorded before studio production begins.
7.3: Understanding Allocation Templates and Their Benefits
Estimated Reading Time: 1.5 minutes
Eliminating Repetitive Network Mapping
Most retail marketing campaigns follow predictable distribution footprints. For example, a seasonal refresh may always use the same poster split across Tier 1 flagship stores, a smaller set for Tier 2 locations, and window decals for Tier 3 pop-ups. Rebuilding these exact same store groups for every individual campaign is not efficient and time consuming.
Allocation Templates let you save these recurring distribution patterns as reusable layout frameworks.
Core Platform Benefits
- One-Click Deployments: Instantly load your target store groupings, regional splits, and fixture rules into new campaign configurations without manual sorting.
- Distribution Safety: Reduce the risk of front-line store distribution errors by applying verified, pre-approved location lists to your live creative briefs.
- Operational Agility: Scale and adjust active campaigns rapidly. If your baseline network tier structure updates, modifying the master allocation template pushes those adjustments out to all connected campaign rows.
The Takeaway: Allocation Templates turn repetitive network distribution tasks into a fast, reusable process. They safeguard your distribution channels, allowing your team to move from campaign setup to production in a fraction of the time.
Practice Guides
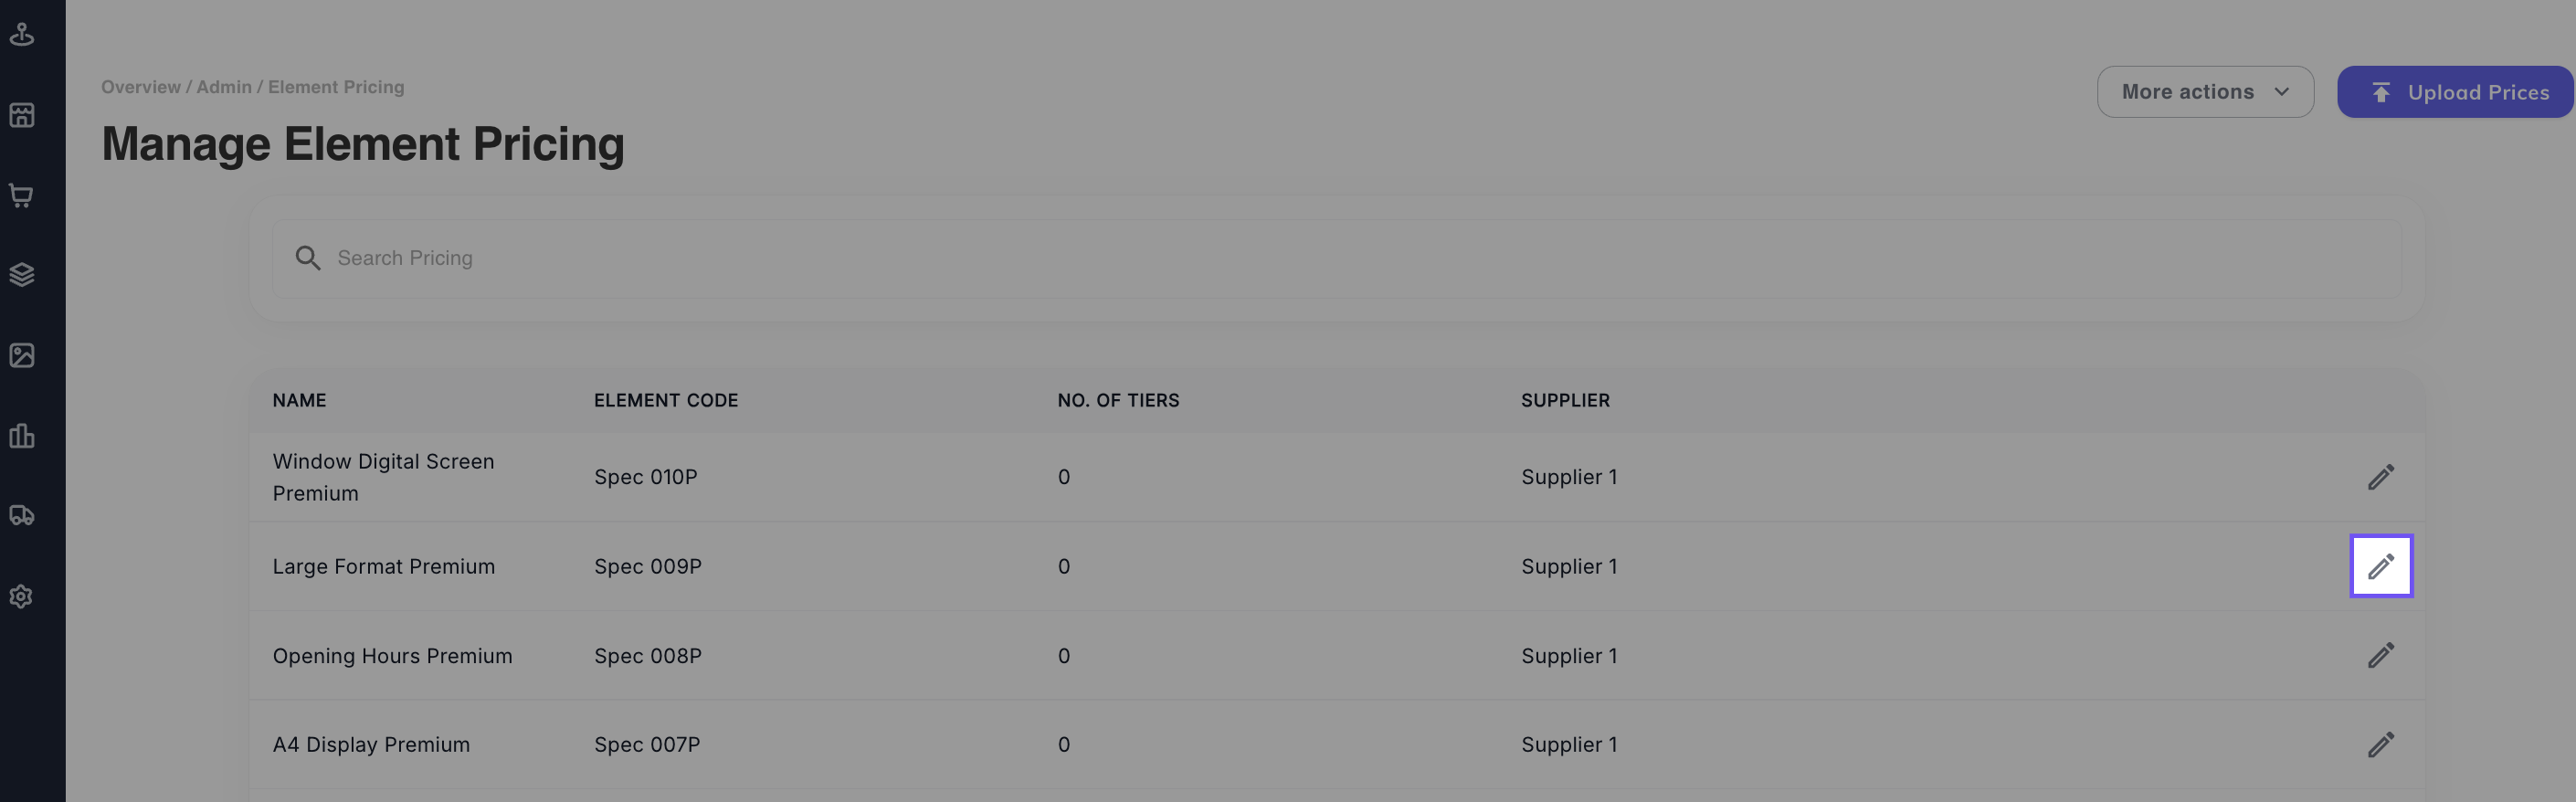
7.4: Using Element Pricing
- Navigate to the Admin panel via the main navigation bar and open Element Pricing.
- Select your target production material tier from the list
- Click Add New Tier to construct a new line.
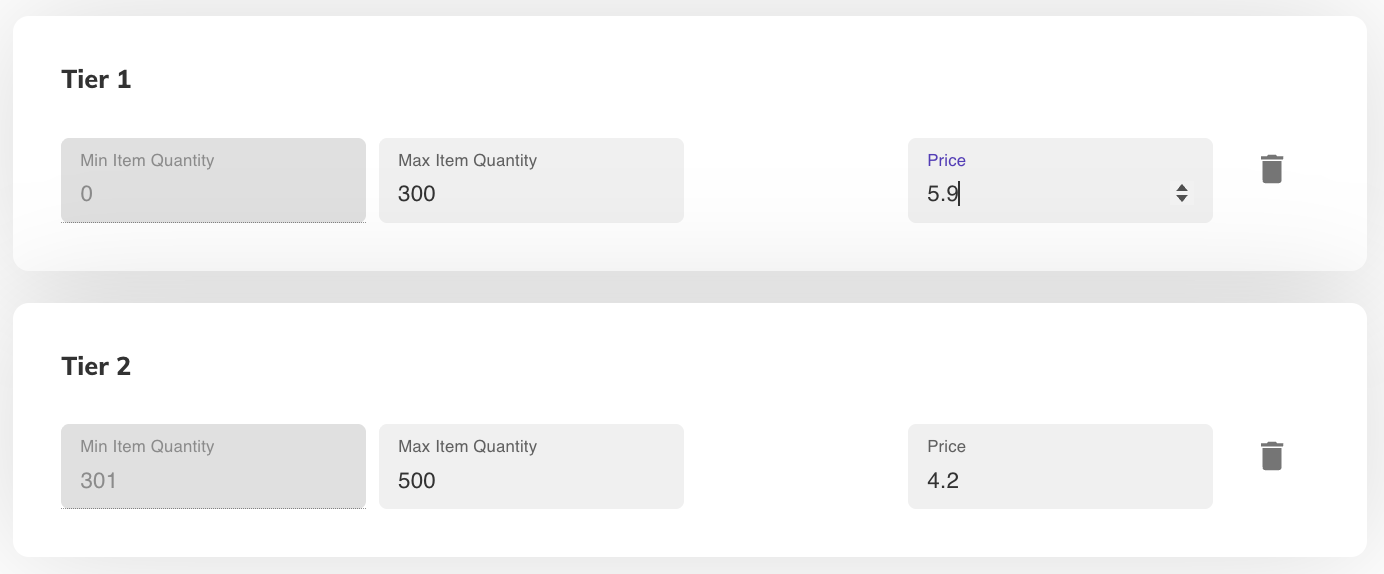
- Set your structural costing rules by defining the unit price and required quantity break breaks.
- The Tiers will save automatically.
Element Pricing Articles for a Deep Dive
7.5: Creating Artwork Briefs
- Navigate to Admin, open Artwork Briefs.
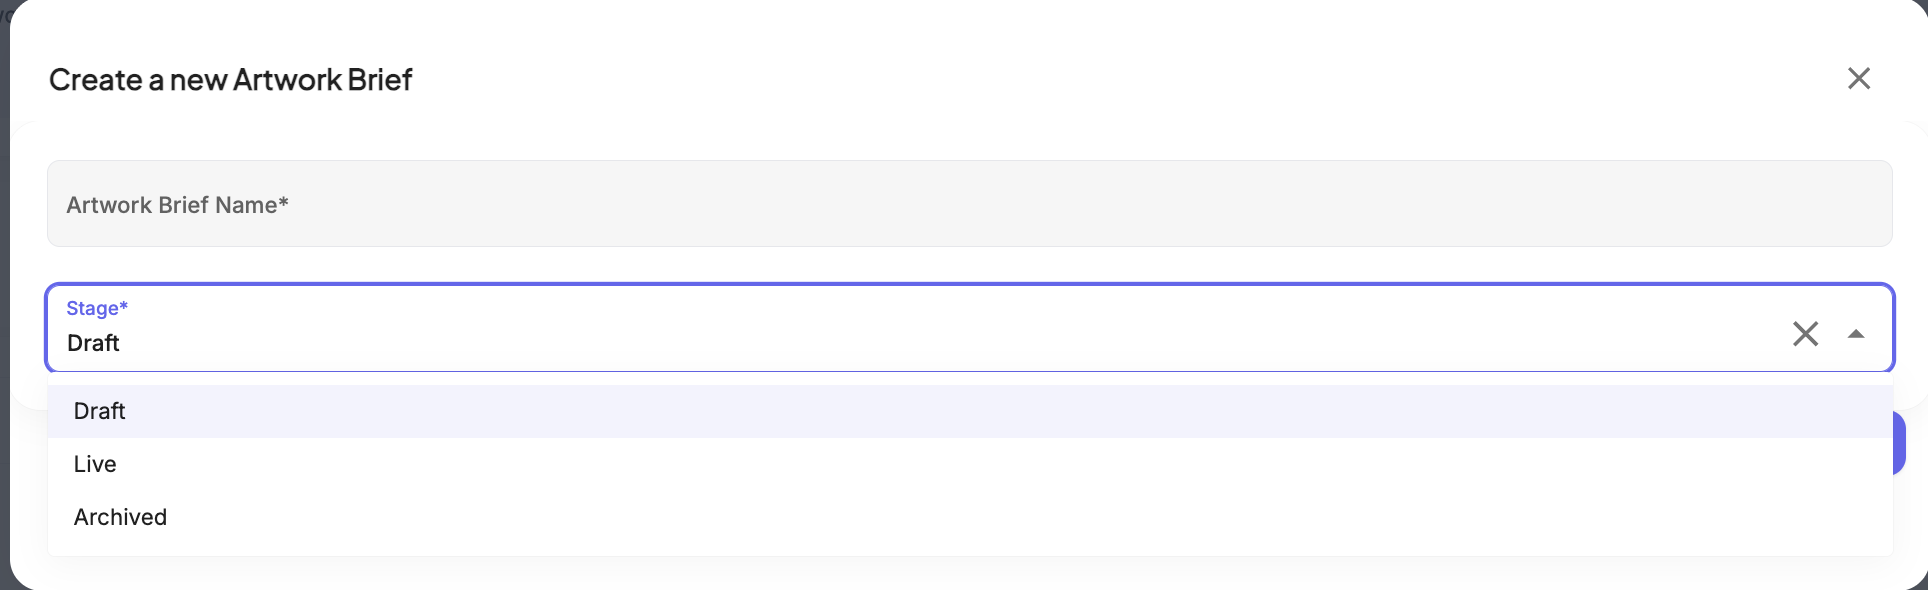
- Click the Create new Artwork Brief button in the top right corner of the dashboard panel.
- Input the name and set the Artwork Brief status
- Once inside the Artwork Brief you can upload an image, add extra details and add in dates.
Artwork Briefs Articles for a Deep Dive
7.6: Creating Allocation Templates
- Navigate to the Admin, open Allocation Rules
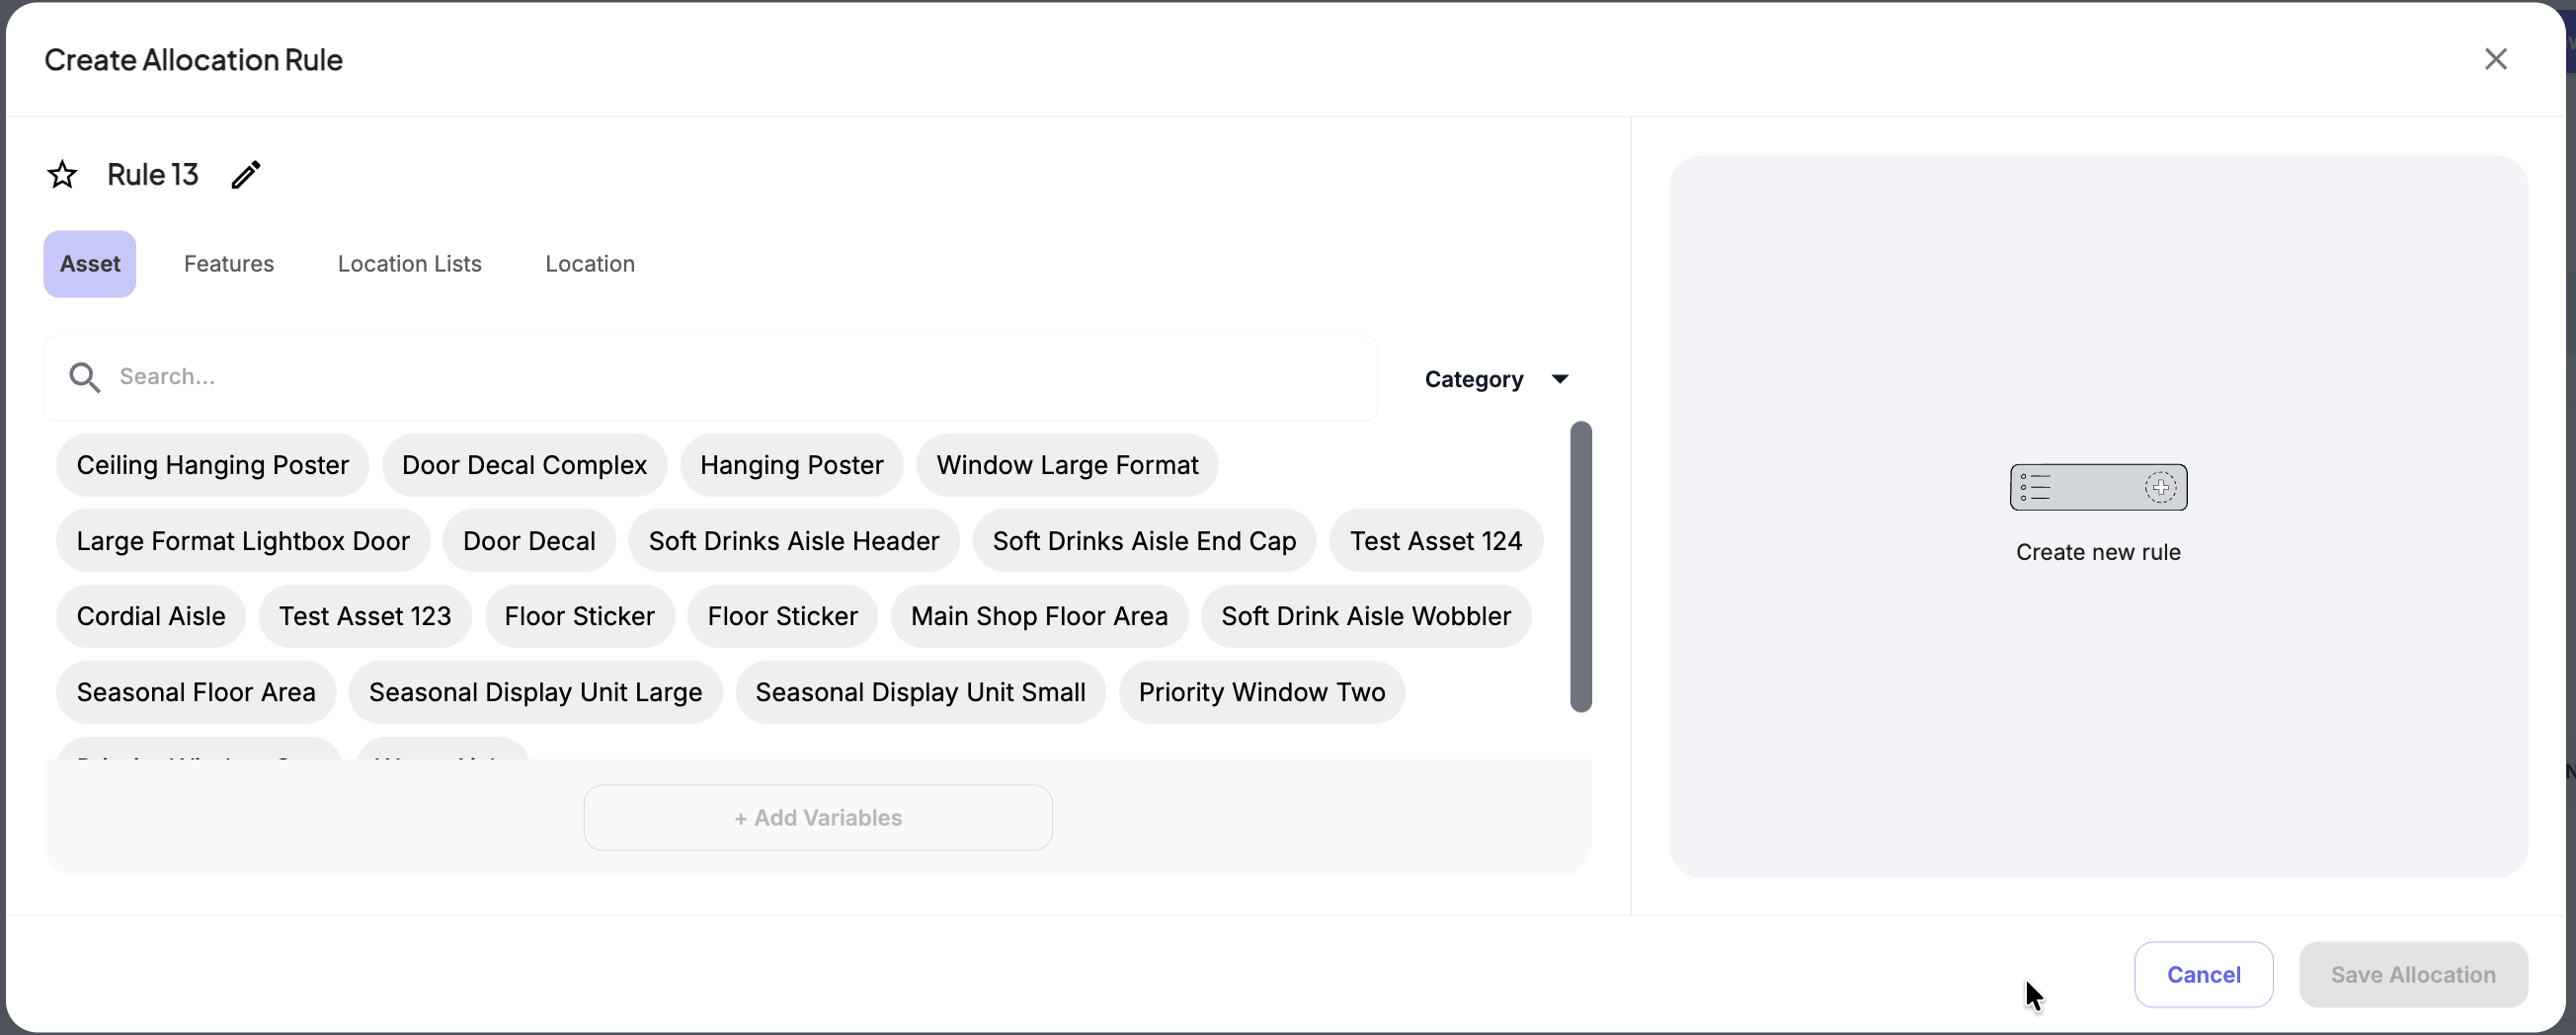
- Click Create New Rules
- In the modal you can start allocating. Choose Between: Asset, Features, Location Lists & Location
- When choosing your allocations they will appear on the right side
Click to Save Allocation
Allocation Rules Articles for a Deep Dive